


Synology NAS systems can serve as modern Time Machine destinations when configured with the current DSM workflow over SMB. The important work happens on the NAS side: create or enable the correct backup share, use a restricted account, set a sensible quota, size the protected drive pool and validate an actual restore. This page keeps those steps specific to Synology so Mac owners do not accidentally copy menu paths or permission assumptions from another NAS platform.
Built for current SMB-based Time Machine workflows, with capacity planning, restore checks and hardware choices separated so one weak link does not undermine the whole backup plan.
Use Synology Time Machine over SMB, keep the backup in a dedicated share, set a quota for each Mac and validate one restore after the first full backup. DSM exposes the share, user and quota controls needed to keep Mac backups separate from other NAS data.
What matters before you start
Time Machine over a NAS is a chain of storage, protocol, account, quota and network decisions. Check the chain before buying more hardware.
Use the current vendor workflow.
Avoid the NAS administrator login.
Use Mac storage plus history/growth.
Recover one file before trusting the workflow.
Synology Time Machine Setup Checker
Answer five setup questions about DSM, the backup share, account, quota and restore test. The checker identifies the next step without changing NAS settings automatically.
Choose your inputs, then calculate a practical next step.
Synology NAS and drive options for Time Machine
Complete Synology NAS systems are separated from NAS-rated hard drives and optional Mac/network upgrades. Accessories cannot qualify as a NAS listing.
Synology NAS
4 options
Synology 2-Bay DiskStation DS223j (Diskless)
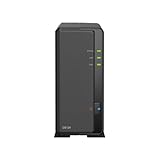
Synology DiskStation DS124 NAS Server with RTD1619B 4-Core 1.7GHz CPU, 1GB Memory, 22TB HDD Storage, 1 x 1GbE LAN Port, DSM Operating System
Synology DiskStation DS124 NAS Server with RTD1619B 4-Core 1.7GHz CPU, 1GB Memory, 4TB SSD Storage, 1 x 1GbE LAN Port, DSM Operating System
Synology DiskStation DS124 NAS Server with RTD1619B 4-Core 1.7GHz CPU, 1GB Memory, 1TB SSD Storage, 1 x 1GbE LAN Port, DSM Operating System
NAS hard drives
4 options
Toshiba N300 14TB NAS 3.5-Inch Internal Hard Drive - CMR SATA 6 Gb/s 7200 RPM 512 MB Cache - HDWG51EXZSTA

Western Digital 18TB WD Red Pro NAS Internal Hard Drive HDD - 7200 RPM, SATA 6 Gb/s, CMR, 512 MB Cache, 3.5" - WD181KFGX

Western Digital 12TB WD Red Pro NAS Internal Hard Drive HDD - 7200 RPM, SATA 6 Gb/s, CMR, 256 MB Cache, 3.5" - WD121KFBX

Western Digital 12TB WD Red Plus NAS Internal Hard Drive HDD - 7200 RPM, SATA 6 GB/s, CMR, 512 MB Cache, 3.5" - WD120EFBX
Mac 2.5GbE adapters
4 options
StarTech 2.5GbE USB-C to Ethernet Adapter, USB-A Converter, NBASE-T NIC
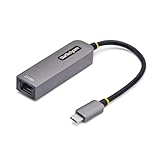
StarTech 2.5GbE USB-C to Ethernet Adapter, 100W PD Pass-Through, NBASE-T

StarTech 2.5GbE USB C to Ethernet Adapter, NBASE-T NIC, 3.1 Laptop, MacBook

StarTech 2.5GbE USB-C to Ethernet Adapter, NBASE-T NIC, Thunderbolt
2.5GbE switches
4 options
YuanLey 8 Port 2.5G Ethernet Switch Unmanaged, 8 x 2.5GbE RJ45

8 Port 2.5G Ethernet Switch Unmanaged Network Switch with 8 x 2.5 Gigabit | Work with 10-100-1000Mbps Devices | 40G Bandwidth | Plug & Play | Fanless Quiet Internet Switch Ethernet Splitter

NUBASA 8 Port 2.5Gb Switch, Pro-Level 2.5 Gigabit Ethernet Switch Unmanaged

Tenda 2.5Gb Ethernet Switch, 5 Port Multi-Gigabit 2.5G Ethernet Splitter
Amazon prices, sellers and stock can change. Confirm the exact model, capacity, condition and final price at checkout.
Time Machine on Synology NAS: SMB Setup, Quotas and Mac Backup Guide decision matrix
Use this as a planning shortcut, then verify the exact NAS model, operating-system version, drive support and network path before buying.
| Choice | Best fit | Why it works | Watch for |
|---|---|---|---|
| 2-bay Synology | One or two Macs | Simple mirror and lower cost | Capacity ceiling |
| 4-bay Synology | Several Macs or shared storage | Better expansion runway | Higher initial cost |
| NAS HDD mirror | Backup-focused pool | Simple redundancy model | Half raw two-drive capacity is usable |
| 2.5GbE path | Large first backups | Faster transfers when both ends support it | Not required for routine Time Machine |
Before you commit the backup
Use current DSM
Vendor menu paths and SMB behavior should match the installed OS release.
Dedicated backup identity
Keep Time Machine credentials separate from NAS administration.
Quota and reserve
Do not assign every terabyte of the pool to backup quotas.
Restore drill
Test recovery after setup and major updates.
How Time Machine works on Synology
DSM can present a dedicated shared folder as the Mac backup destination while SMB handles the file transport. Keep the Time Machine share separate from normal family folders so permissions and consumption remain obvious in DSM. This section focuses on how time machine works on synology because it is a different decision from simply seeing the NAS in Finder. The objective is a configuration that stays understandable months later, when the backup has accumulated history and the NAS is doing other work.
For Synology owners, the practical standard is repeatability: another administrator should be able to identify the DSM setting, the Mac account and the storage boundary without guessing. Keep the working path documented, preserve free-space headroom, and avoid changing several variables at once when a backup is interrupted.
SMB is the transport
In DSM, verify smb is the transport directly in the current control panels rather than relying on an old screenshot. Record the share name, backup user and quota so a later firmware update can be checked against a known working configuration. On DiskStation hardware, this check also helps separate a platform setting from a disk or network problem.
DSM settings control the destination
For Synology specifically, dsm settings control the destination should be validated with one small backup/restore cycle. If the Mac can authenticate and recover a file, leave the working path stable before adding snapshots, extra users or other services. On DiskStation hardware, this check also helps separate a platform setting from a disk or network problem.
Create the Synology Time Machine share
Create a dedicated shared folder and a non-admin backup user. The useful DSM advantage is that folder permissions, user access and storage controls can be reviewed from the same administrative environment instead of being mixed with the Mac login. This section focuses on create the synology time machine share because it is a different decision from simply seeing the NAS in Finder. The objective is a configuration that stays understandable months later, when the backup has accumulated history and the NAS is doing other work.
Share creation
In DSM, verify share creation directly in the current control panels rather than relying on an old screenshot. Record the share name, backup user and quota so a later firmware update can be checked against a known working configuration. On DiskStation hardware, this check also helps separate a platform setting from a disk or network problem.
Permissions for the backup account
For Synology specifically, permissions for the backup account should be validated with one small backup/restore cycle. If the Mac can authenticate and recover a file, leave the working path stable before adding snapshots, extra users or other services. On DiskStation hardware, this check also helps separate a platform setting from a disk or network problem.
Set quotas for each Mac
Synology quota planning should start from the Mac rather than the NAS drive label. Give each Mac a defined allowance and preserve unassigned pool capacity so DSM services, snapshots and future Macs do not fight the backup for the last free space. This section focuses on set quotas for each mac because it is a different decision from simply seeing the NAS in Finder. The objective is a configuration that stays understandable months later, when the backup has accumulated history and the NAS is doing other work.
Quota sizing
In DSM, verify quota sizing directly in the current control panels rather than relying on an old screenshot. Record the share name, backup user and quota so a later firmware update can be checked against a known working configuration. On DiskStation hardware, this check also helps separate a platform setting from a disk or network problem.
Free-space reserve
For Synology specifically, free-space reserve should be validated with one small backup/restore cycle. If the Mac can authenticate and recover a file, leave the working path stable before adding snapshots, extra users or other services. On DiskStation hardware, this check also helps separate a platform setting from a disk or network problem.
Connect macOS to the NAS
Before selecting the DiskStation in Time Machine, confirm that the Mac can reach the intended DSM share over SMB with the backup credentials. That simple Finder test separates network/authentication issues from Time Machine-specific behavior. This section focuses on connect macos to the nas because it is a different decision from simply seeing the NAS in Finder. The objective is a configuration that stays understandable months later, when the backup has accumulated history and the NAS is doing other work.
Finder connectivity
In DSM, verify finder connectivity directly in the current control panels rather than relying on an old screenshot. Record the share name, backup user and quota so a later firmware update can be checked against a known working configuration. On DiskStation hardware, this check also helps separate a platform setting from a disk or network problem.
Select the destination in Time Machine
For Synology specifically, select the destination in time machine should be validated with one small backup/restore cycle. If the Mac can authenticate and recover a file, leave the working path stable before adding snapshots, extra users or other services. On DiskStation hardware, this check also helps separate a platform setting from a disk or network problem.
Run the first backup efficiently
The first DiskStation backup is a bulk-transfer event. Keep the Synology wired to the router or switch, avoid starting a storage scrub or large media import at the same time, and use wired Mac Ethernet when the initial data set is very large. This section focuses on run the first backup efficiently because it is a different decision from simply seeing the NAS in Finder. The objective is a configuration that stays understandable months later, when the backup has accumulated history and the NAS is doing other work.
Initial full backup
In DSM, verify initial full backup directly in the current control panels rather than relying on an old screenshot. Record the share name, backup user and quota so a later firmware update can be checked against a known working configuration. On DiskStation hardware, this check also helps separate a platform setting from a disk or network problem.
Later incremental behavior
For Synology specifically, later incremental behavior should be validated with one small backup/restore cycle. If the Mac can authenticate and recover a file, leave the working path stable before adding snapshots, extra users or other services. On DiskStation hardware, this check also helps separate a platform setting from a disk or network problem.
Use NAS HDDs and redundancy deliberately
For a backup-focused DiskStation, a two-drive mirror is easy to understand: one drive worth of usable protected capacity, plus the ability to stay online after one drive failure. Four bays matter when several Macs and shared NAS data need more growth room. This section focuses on use nas hdds and redundancy deliberately because it is a different decision from simply seeing the NAS in Finder. The objective is a configuration that stays understandable months later, when the backup has accumulated history and the NAS is doing other work.
Two-drive mirror
In DSM, verify two-drive mirror directly in the current control panels rather than relying on an old screenshot. Record the share name, backup user and quota so a later firmware update can be checked against a known working configuration. On DiskStation hardware, this check also helps separate a platform setting from a disk or network problem.
Four-bay growth path
For Synology specifically, four-bay growth path should be validated with one small backup/restore cycle. If the Mac can authenticate and recover a file, leave the working path stable before adding snapshots, extra users or other services. On DiskStation hardware, this check also helps separate a platform setting from a disk or network problem.
Multiple Macs on one Synology NAS
DSM users and quotas make multi-Mac separation straightforward when every Mac has a named owner and backup identity. Do not point every household Mac at one administrator account just because the share appears to work that way. This section focuses on multiple macs on one synology nas because it is a different decision from simply seeing the NAS in Finder. The objective is a configuration that stays understandable months later, when the backup has accumulated history and the NAS is doing other work.
Separate backup identities
In DSM, verify separate backup identities directly in the current control panels rather than relying on an old screenshot. Record the share name, backup user and quota so a later firmware update can be checked against a known working configuration. On DiskStation hardware, this check also helps separate a platform setting from a disk or network problem.
Track capacity per Mac
For Synology specifically, track capacity per mac should be validated with one small backup/restore cycle. If the Mac can authenticate and recover a file, leave the working path stable before adding snapshots, extra users or other services. On DiskStation hardware, this check also helps separate a platform setting from a disk or network problem.
Troubleshoot failed backups in layers
Synology troubleshooting is clearest when Storage Manager health, DSM share permissions and SMB reachability are checked before deleting a Time Machine bundle. Capacity pressure and drive warnings should be ruled out before changing the backup destination. This section focuses on troubleshoot failed backups in layers because it is a different decision from simply seeing the NAS in Finder. The objective is a configuration that stays understandable months later, when the backup has accumulated history and the NAS is doing other work.
NAS-side checks
In DSM, verify nas-side checks directly in the current control panels rather than relying on an old screenshot. Record the share name, backup user and quota so a later firmware update can be checked against a known working configuration. On DiskStation hardware, this check also helps separate a platform setting from a disk or network problem.
Mac-side checks
For Synology specifically, mac-side checks should be validated with one small backup/restore cycle. If the Mac can authenticate and recover a file, leave the working path stable before adding snapshots, extra users or other services. On DiskStation hardware, this check also helps separate a platform setting from a disk or network problem.
Restore testing and disaster planning
A DiskStation backup should be judged by recovery, not by the timestamp of the last successful run. Restore a disposable file through Time Machine, then keep an independent copy of irreplaceable data outside the same NAS failure domain. This section focuses on restore testing and disaster planning because it is a different decision from simply seeing the NAS in Finder. The objective is a configuration that stays understandable months later, when the backup has accumulated history and the NAS is doing other work.
Test a file restore
In DSM, verify test a file restore directly in the current control panels rather than relying on an old screenshot. Record the share name, backup user and quota so a later firmware update can be checked against a known working configuration. On DiskStation hardware, this check also helps separate a platform setting from a disk or network problem.
Plan for NAS failure too
For Synology specifically, plan for nas failure too should be validated with one small backup/restore cycle. If the Mac can authenticate and recover a file, leave the working path stable before adding snapshots, extra users or other services. On DiskStation hardware, this check also helps separate a platform setting from a disk or network problem.
When to upgrade the Synology hardware
Upgrade a Synology Time Machine target when capacity, bay count or network demand becomes a measured constraint. A faster processor alone rarely improves a backup workload enough to justify moving data into a new chassis. This section focuses on when to upgrade the synology hardware because it is a different decision from simply seeing the NAS in Finder. The objective is a configuration that stays understandable months later, when the backup has accumulated history and the NAS is doing other work.
Capacity-driven upgrades
In DSM, verify capacity-driven upgrades directly in the current control panels rather than relying on an old screenshot. Record the share name, backup user and quota so a later firmware update can be checked against a known working configuration. On DiskStation hardware, this check also helps separate a platform setting from a disk or network problem.
Network-driven upgrades
For Synology specifically, network-driven upgrades should be validated with one small backup/restore cycle. If the Mac can authenticate and recover a file, leave the working path stable before adding snapshots, extra users or other services. On DiskStation hardware, this check also helps separate a platform setting from a disk or network problem.
Time Machine NAS questions
Does Synology NAS support Time Machine?
Synology provides a Time Machine workflow on its current NAS platform. Use the current DSM documentation and SMB-based setup.
Should I use a separate user for Time Machine on Synology?
Yes, a dedicated backup account improves isolation and makes permissions and quotas easier to reason about.
How large should the quota be?
Apple’s ideal baseline is at least twice the Mac storage capacity. Increase that for desired history depth, growth and multiple Macs.
Should I use Wi-Fi or Ethernet?
Keep the NAS itself on Ethernet. Macs can back up over Wi-Fi, but wired Ethernet can make a large first backup faster and more stable.
Primary setup references
Use current vendor documentation for final menu paths and compatibility details because NAS operating systems and macOS behavior can change.
- Apple: Backup disks you can use with Time Machine
- Apple: Time Machine storage sizing guidance
- Synology personal backup and Time Machine
- Synology Time Machine quota guidance
Cloudzat may earn from qualifying Amazon purchases. Confirm the exact product, capacity, condition and checkout price before buying.