


Time Machine can back up to a third-party NAS when the NAS supports Time Machine over SMB. A reliable setup has five parts: a dedicated SMB share, a restricted backup account, a sensible quota, enough protected storage and a network path that remains reachable when the Mac wakes for backup. This guide is vendor-neutral, so it focuses on the architecture and validation steps that apply before you switch to the Synology, UGREEN or QNAP-specific instructions.
Built for current SMB-based Time Machine workflows, with capacity planning, restore checks and hardware choices separated so one weak link does not undermine the whole backup plan.
The cleanest Time Machine-to-NAS setup is a dedicated SMB share with its own backup user, a per-Mac quota and enough usable protected storage to hold current data plus history. Keep the NAS on Ethernet, complete the initial backup, then restore a test file so you know discovery, credentials and history navigation all work.
What matters before you start
Time Machine over a NAS is a chain of storage, protocol, account, quota and network decisions. Check the chain before buying more hardware.
Use the vendor’s current Time Machine/SMB workflow.
Limit access to the intended backup share.
Base it on Mac storage and desired history.
Recover one disposable file after the first backup.
Time Machine NAS Setup Checker
Select your NAS protocol, number of Macs, quota plan, network speed and whether a restore has been tested. The checker highlights the next setup step.
Choose your inputs, then calculate a practical next step.
Hardware that fits a Time Machine NAS setup
Use these options when you need the NAS itself, NAS-rated drives or an Ethernet upgrade. The setup guide works independently of any purchase.
Synology NAS
4 options
Synology 2-Bay DiskStation DS223j (Diskless)

Synology DiskStation DS124 NAS Server with RTD1619B 4-Core 1.7GHz CPU, 1GB Memory, 22TB HDD Storage, 1 x 1GbE LAN Port, DSM Operating System
Synology DiskStation DS124 NAS Server with RTD1619B 4-Core 1.7GHz CPU, 1GB Memory, 4TB SSD Storage, 1 x 1GbE LAN Port, DSM Operating System
Synology DiskStation DS124 NAS Server with RTD1619B 4-Core 1.7GHz CPU, 1GB Memory, 1TB SSD Storage, 1 x 1GbE LAN Port, DSM Operating System
UGREEN NAS
4 options
UGREEN NAS DH2300 2-Bay Bundle 16 Inch 2.5K Portable Monitor with Magnetic Stand for Work & Gaming

UGREEN DXP4800 Plus 4-Bay NAS for Families, Creators & Small Teams

UGREEN DXP2800 GT NAS for Smart Home Enthusiasts, Creators & Freelancers
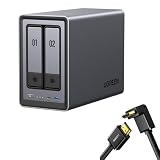
UGREEN NASync DXP2800 2-Bay Desktop NAS,Network Attached Storage (Diskless) Bundle with HDMI Cable Right Angle 4K 90 Degree HDMI Cord 3.3FT
QNAP NAS
4 options
QNAP TS-464eU-8G-US 4 Bay 1U Short Depth Rackmount NAS

QNAP TS-264-8G-US 2 Bay Desktop NAS
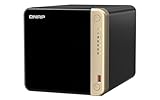
QNAP TS-464-8G-US 4 Bay Desktop NAS

QNAP TS-433-4G-US 4 Bay NAS
TerraMaster NAS
4 options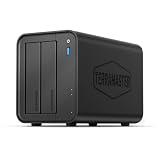
TERRAMASTER F2-425 2-Bay NAS Intel x86 Quad-Core CPU 4GB RAM (Diskless)

TERRAMASTER F4-425 4-Bay NAS Intel x86 Quad-Core CPU 4GB RAM (Diskless)

TERRAMASTER F4-425 Plus NAS 4-Bay, Intel N95 4-Core CPU, 8GB RAM (Diskless)

TERRAMASTER F4-425 Pro NAS 4-Bay, Intel N305 8-Core, 8GB RAM (Diskless)
ASUSTOR NAS
4 options
Asustor AS5402T, 2 Bay NAS with 1 x 4TB SSD (WDS400T4B0E), Intel Quad-Core 2.0GHz CPU, 4X M.2 NVMe SSD Slots, 2x2.5GbE Ports, 4GB DDR4 RAM, for Gaming and Live Stream, Network Attached Storage

Asustor Drivestor 2 Pro Gen2 AS3302T v2, 2 Bay NAS, Home Cloud Backup

Asustor Drivestor 2 Gen 2 AS1202T 2 Bay NAS Storage for Personal Home Users

Asustor Drivestor 4 Gen 2 AS1204T, 4 Bay NAS, Personal Home Cloud Backup
NAS hard drives
4 options
Toshiba N300 14TB NAS 3.5-Inch Internal Hard Drive - CMR SATA 6 Gb/s 7200 RPM 512 MB Cache - HDWG51EXZSTA

Western Digital 18TB WD Red Pro NAS Internal Hard Drive HDD - 7200 RPM, SATA 6 Gb/s, CMR, 512 MB Cache, 3.5" - WD181KFGX

Western Digital 12TB WD Red Pro NAS Internal Hard Drive HDD - 7200 RPM, SATA 6 Gb/s, CMR, 256 MB Cache, 3.5" - WD121KFBX

Western Digital 12TB WD Red Plus NAS Internal Hard Drive HDD - 7200 RPM, SATA 6 GB/s, CMR, 512 MB Cache, 3.5" - WD120EFBX
Mac 2.5GbE adapters
4 options
StarTech 2.5GbE USB-C to Ethernet Adapter, USB-A Converter, NBASE-T NIC

StarTech 2.5GbE USB-C to Ethernet Adapter, 100W PD Pass-Through, NBASE-T

StarTech 2.5GbE USB C to Ethernet Adapter, NBASE-T NIC, 3.1 Laptop, MacBook

StarTech 2.5GbE USB-C to Ethernet Adapter, NBASE-T NIC, Thunderbolt
2.5GbE switches
4 options
YuanLey 8 Port 2.5G Ethernet Switch Unmanaged, 8 x 2.5GbE RJ45

8 Port 2.5G Ethernet Switch Unmanaged Network Switch with 8 x 2.5 Gigabit | Work with 10-100-1000Mbps Devices | 40G Bandwidth | Plug & Play | Fanless Quiet Internet Switch Ethernet Splitter

NUBASA 8 Port 2.5Gb Switch, Pro-Level 2.5 Gigabit Ethernet Switch Unmanaged

Tenda 2.5Gb Ethernet Switch, 5 Port Multi-Gigabit 2.5G Ethernet Splitter
Amazon prices, sellers and stock can change. Confirm the exact model, capacity, condition and final price at checkout.
Time Machine Backup to NAS: SMB Setup, Quotas, Storage and Restore Testing decision matrix
Use this as a planning shortcut, then verify the exact NAS model, operating-system version, drive support and network path before buying.
| Choice | Best fit | Why it works | Watch for |
|---|---|---|---|
| Dedicated SMB share | Most homes | Simple permissions and quota | Needs enough protected pool space |
| Separate share per Mac | Stricter isolation | Clear accounting | More administration |
| One shared Time Machine share | Small trusted household | Easy setup | Quota design matters |
| Direct disk instead | One Mac without network need | Fewest moving parts | No always-on network target |
Before you commit the backup
Dedicated share
Keep Time Machine data away from ordinary shared folders.
Dedicated credentials
Avoid using the NAS administrator account from Time Machine.
Capacity headroom
Leave room above the assigned quotas for NAS operations and growth.
Restore validation
A backup is incomplete as a plan until recovery has been tested.
How Time Machine reaches a NAS
For Time Machine Backup to NAS: SMB Setup, Quotas, Storage and Restore Testing, the useful starting point is SMB is the modern transport. The NAS publishes a network share and the Mac authenticates to that destination using an account permitted to write backups. If discovery works but credentials or share permissions are wrong, Time Machine can still fail after the target appears. Treat protocol, share and account as three separate layers during setup. That sequence keeps the backup plan tied to an observable requirement instead of a headline specification.
SMB and Bonjour have different jobs
SMB is the modern transport. Confirm the exact setting on both the NAS and the Mac before starting a large backup. If discovery works but credentials or share permissions are wrong, Time Machine can still fail after the target appears. Keep this check narrow enough that a failed first backup does not trigger unrelated changes elsewhere in the NAS.
Avoid NAS administrator credentials
In this part of Time Machine Backup to NAS: SMB Setup, Quotas, Storage and Restore Testing, Treat protocol, share and account as three separate layers during setup.. Use a small validation step first, then expand the configuration only after the first backup and restore behave correctly. The NAS publishes a network share and the Mac authenticates to that destination using an account permitted to write backups. Validate one change at a time and record the setting that made the difference.
Create a dedicated Time Machine share
The decision around Time Machine Backup to NAS: SMB Setup, Quotas, Storage and Restore Testing changes once separation simplifies permissions and cleanup. Putting Time Machine data in its own share makes quotas, access rules and troubleshooting easier to understand. In practice, Mixing backups with general household files makes capacity reporting and deletion risk less clear. Name the share clearly and restrict it to backup identities. This makes it easier to separate a capacity problem from a protocol or permissions problem.
Share naming and visibility
This is where separation simplifies permissions and cleanup. Confirm the exact setting on both the NAS and the Mac before starting a large backup. Mixing backups with general household files makes capacity reporting and deletion risk less clear. A short verification now is more useful than discovering the assumption during a restore emergency.
One share versus several shares
The operational rule is simple: Name the share clearly and restrict it to backup identities.. Use a small validation step first, then expand the configuration only after the first backup and restore behave correctly. Putting Time Machine data in its own share makes quotas, access rules and troubleshooting easier to understand. Re-test after a major macOS, NAS OS or storage-layout change.
Use a dedicated backup account
A reliable Time Machine Backup to NAS: SMB Setup, Quotas, Storage and Restore Testing workflow depends on more than the enclosure. Start by recognizing that least privilege is easier to maintain. A normal backup user does not need permission to administer the NAS or browse unrelated private shares. Using an administrator account from every Mac widens the impact of a stolen credential. Create the smallest permission set that still allows Time Machine to write and read its history. The result is a configuration that can be checked again after a macOS or NAS update.
Account permissions
Use this step to confirm that least privilege is easier to maintain. Confirm the exact setting on both the NAS and the Mac before starting a large backup. Using an administrator account from every Mac widens the impact of a stolen credential. Once it works, leave the configuration stable long enough to observe an automatic backup cycle.
Separate users for separate Macs
Create the smallest permission set that still allows Time Machine to write and read its history.. Use a small validation step first, then expand the configuration only after the first backup and restore behave correctly. A normal backup user does not need permission to administer the NAS or browse unrelated private shares. Keep this check narrow enough that a failed first backup does not trigger unrelated changes elsewhere in the NAS.
Set a quota before the first full backup
When planning Time Machine Backup to NAS: SMB Setup, Quotas, Storage and Restore Testing, treat history should have a boundary as a design constraint rather than an afterthought. Without a quota, one Mac can expand until the whole pool is under pressure. The problem becomes worse when several Macs have large SSDs and long-lived histories. Set quotas from the storage calculator rather than guessing from current used space alone. That is more useful than buying extra hardware before the actual bottleneck is known.
Quota per Mac
In this part of Time Machine Backup to NAS: SMB Setup, Quotas, Storage and Restore Testing, history should have a boundary. Confirm the exact setting on both the NAS and the Mac before starting a large backup. The problem becomes worse when several Macs have large SSDs and long-lived histories. Validate one change at a time and record the setting that made the difference.
Pool reserve beyond quotas
This is where Set quotas from the storage calculator rather than guessing from current used space alone.. Use a small validation step first, then expand the configuration only after the first backup and restore behave correctly. Without a quota, one Mac can expand until the whole pool is under pressure. A short verification now is more useful than discovering the assumption during a restore emergency.
Complete the initial backup on a stable network
The strongest way to evaluate Time Machine Backup to NAS: SMB Setup, Quotas, Storage and Restore Testing is to ask whether the first run is different from normal operation. The first backup copies the existing data set, so Wi-Fi sleep, roaming and congestion can have a larger effect than they will later. Repeatedly interrupted first runs create a poor baseline for judging NAS performance. Use Ethernet on the NAS and consider wired Ethernet on the Mac during the initial transfer. Keeping that distinction clear prevents raw capacity, usable capacity and backup history from being mixed together.
First-backup strategy
The operational rule is simple: the first run is different from normal operation. Confirm the exact setting on both the NAS and the Mac before starting a large backup. Repeatedly interrupted first runs create a poor baseline for judging NAS performance. Re-test after a major macOS, NAS OS or storage-layout change.
Later incrementals are lighter
Use this step to confirm that Use Ethernet on the NAS and consider wired Ethernet on the Mac during the initial transfer.. Use a small validation step first, then expand the configuration only after the first backup and restore behave correctly. The first backup copies the existing data set, so Wi-Fi sleep, roaming and congestion can have a larger effect than they will later. Once it works, leave the configuration stable long enough to observe an automatic backup cycle.
Multiple Macs and household organization
For households using Time Machine Backup to NAS: SMB Setup, Quotas, Storage and Restore Testing, identity and capacity should scale together often determines whether the setup stays simple as more data accumulates. Each Mac should have a clear account/share relationship and an assigned portion of the pool. A family NAS becomes confusing when nobody knows which sparse backup belongs to which machine. Document Mac names, backup users and quotas in the NAS notes. A small amount of planning here avoids disruptive migrations later.
Naming conventions
identity and capacity should scale together. Confirm the exact setting on both the NAS and the Mac before starting a large backup. A family NAS becomes confusing when nobody knows which sparse backup belongs to which machine. Keep this check narrow enough that a failed first backup does not trigger unrelated changes elsewhere in the NAS.
Prevent one Mac consuming all capacity
In this part of Time Machine Backup to NAS: SMB Setup, Quotas, Storage and Restore Testing, Document Mac names, backup users and quotas in the NAS notes.. Use a small validation step first, then expand the configuration only after the first backup and restore behave correctly. Each Mac should have a clear account/share relationship and an assigned portion of the pool. Validate one change at a time and record the setting that made the difference.
Snapshots, RAID and Time Machine are different layers
The practical test for Time Machine Backup to NAS: SMB Setup, Quotas, Storage and Restore Testing is not a benchmark but whether similar words can hide different purposes. Time Machine provides file history; RAID helps keep a storage pool available after some disk failures; NAS snapshots protect NAS-side state depending on platform. None of those layers automatically protects against every deletion, theft or site failure. Decide which failures matter and add an independent copy for irreplaceable data. This keeps day-to-day backup reliability ahead of features that do not improve recovery.
RAID is not a second backup
This is where similar words can hide different purposes. Confirm the exact setting on both the NAS and the Mac before starting a large backup. None of those layers automatically protects against every deletion, theft or site failure. A short verification now is more useful than discovering the assumption during a restore emergency.
When NAS snapshots add value
The operational rule is simple: Decide which failures matter and add an independent copy for irreplaceable data.. Use a small validation step first, then expand the configuration only after the first backup and restore behave correctly. Time Machine provides file history; RAID helps keep a storage pool available after some disk failures; NAS snapshots protect NAS-side state depending on platform. Re-test after a major macOS, NAS OS or storage-layout change.
Troubleshoot in the right order
Think of Time Machine Backup to NAS: SMB Setup, Quotas, Storage and Restore Testing as a chain in which start with reachability, then permissions, then capacity. A failed backup can come from the network, name discovery, password, share setting or free-space condition. Jumping straight to reformatting storage can destroy evidence and make recovery harder. Verify Finder access, reselect the destination if needed, then inspect NAS logs and quota. If one link is weak, more CPU or a faster drive will not fix the underlying workflow.
Network and discovery checks
Use this step to confirm that start with reachability, then permissions, then capacity. Confirm the exact setting on both the NAS and the Mac before starting a large backup. Jumping straight to reformatting storage can destroy evidence and make recovery harder. Once it works, leave the configuration stable long enough to observe an automatic backup cycle.
Permission and capacity checks
Verify Finder access, reselect the destination if needed, then inspect NAS logs and quota.. Use a small validation step first, then expand the configuration only after the first backup and restore behave correctly. A failed backup can come from the network, name discovery, password, share setting or free-space condition. Keep this check narrow enough that a failed first backup does not trigger unrelated changes elsewhere in the NAS.
Restore a file before calling setup complete
A good Time Machine Backup to NAS: SMB Setup, Quotas, Storage and Restore Testing setup leaves room for change because recovery is the product. Time Machine’s purpose is not to display successful backup timestamps; it is to return files when needed. A restore test catches access or history problems while the setup is fresh in your mind. Create a disposable test document, back it up, delete it and recover it. Planning the upgrade path now is usually cheaper than replacing every drive under capacity pressure.
Quick restore drill
In this part of Time Machine Backup to NAS: SMB Setup, Quotas, Storage and Restore Testing, recovery is the product. Confirm the exact setting on both the NAS and the Mac before starting a large backup. A restore test catches access or history problems while the setup is fresh in your mind. Validate one change at a time and record the setting that made the difference.
Full-Mac recovery planning
This is where Create a disposable test document, back it up, delete it and recover it.. Use a small validation step first, then expand the configuration only after the first backup and restore behave correctly. Time Machine’s purpose is not to display successful backup timestamps; it is to return files when needed. A short verification now is more useful than discovering the assumption during a restore emergency.
Maintain the NAS after setup
Before finalizing Time Machine Backup to NAS: SMB Setup, Quotas, Storage and Restore Testing, verify that backup systems age with the rest of the network. Disk health, firmware updates, account changes and capacity growth can alter a setup that once worked perfectly. A maintenance-free assumption leads to surprises when the pool is nearly full or a drive reports errors. Review capacity and SMART/health alerts periodically and repeat the restore test after major changes. The final check should always include a small restore, because recovery is the reason the backup exists.
Capacity review cadence
The operational rule is simple: backup systems age with the rest of the network. Confirm the exact setting on both the NAS and the Mac before starting a large backup. A maintenance-free assumption leads to surprises when the pool is nearly full or a drive reports errors. Re-test after a major macOS, NAS OS or storage-layout change.
Upgrade without breaking Time Machine
Use this step to confirm that Review capacity and SMART/health alerts periodically and repeat the restore test after major changes.. Use a small validation step first, then expand the configuration only after the first backup and restore behave correctly. Disk health, firmware updates, account changes and capacity growth can alter a setup that once worked perfectly. Once it works, leave the configuration stable long enough to observe an automatic backup cycle.
Time Machine NAS questions
Can Time Machine back up to a NAS?
Yes, when the third-party NAS supports Time Machine over SMB. Apple explicitly lists this as a supported destination type.
Should each Mac have a separate NAS user?
It is a strong practice for isolation and quota management, especially in households or teams with several Macs.
How large should the quota be?
Apple’s general guidance is at least twice the Mac storage capacity for a Time Machine disk. Adjust upward for longer history, growth and multiple Macs.
Do I need a dedicated Time Machine share?
It is not the only possible design, but it simplifies permissions, quotas, reporting and troubleshooting.
Primary setup references
Use current vendor documentation for final menu paths and compatibility details because NAS operating systems and macOS behavior can change.
- Apple: Backup disks you can use with Time Machine
- Apple: Time Machine storage sizing guidance
- QNAP example: Time Machine over SMB 3
Cloudzat may earn from qualifying Amazon purchases. Confirm the exact product, capacity, condition and checkout price before buying.