


Large-object scanning guide
Top picks
The scanners I would shortlist first
EINSTAR VEGA
Portable all-in-one scanner for large or mobile capture.
See Amazon optionsRevopoint MIRACO
Standalone capture is useful when you need to move freely around the subject.
See Amazon optionsEINSTAR 2
Strong for dark surfaces, larger parts and workshop scanning.
See Amazon optionsBefore you buy
Match the scanner to the object
Object size
objects from roughly torso size to furniture, panels and room-scale pieces.
Surface
broad matte areas, dark sections, glossy panels, repeated shapes and low-feature expanses.
Detail goal
Prioritize overall dimensions, curvature, edge transitions, large feature relationships and selected local details.
Output
Plan for large-scale replicas, fit references, design overlays, visualization, fabrication and segmented 3D prints.
Object checker
Which scanner should I start with?
Choose the closest description of your object and workflow. The result is a practical starting point, not a substitute for checking the exact model specifications.
Shopping options
Current 3D scanners for this use case
Compare the exact model and included items before checkout. Prices and availability can change on Amazon.
EINSTAR VEGA
Standalone small-to-large object capture

EINSTAR Vega 3D Scanner with Tripod, Portable Wireless 3D Scanner with All-in-one Design, Comprehensive Object Scanning, Support Outdoor Scanning, 32G RAM + 512G SSD, 2K AMOLED Touch Screen
Standalone small-to-large object capture
Seller: SHINING 3D TECHNOLOGY INC
Shining 3D Einstar Vega Wireless 3D Scanner All-in-one Handheld 3D Scanner Two Scanning Technology Support Small to Large Objects, Stable Outdoor Scanning, 8-core 2.4GHz CPU, 512G SSD and 32G RAM
Standalone small-to-large object capture
Seller: SHINING 3D TECHNOLOGY INCRevopoint MIRACO
Mobile medium and large-object capture

Revopoint MIRACO 3D Scanner & Dual-Axis Turntable Bundle, Portable 3D Scanner for 3D Printing Handheld, Full Color 3D, Model Scanning Compatible with Android/iOS/Mac/Win
Mobile medium and large-object capture
Seller: Revopoint Official Store
Revopoint MIRACO 3D Scanner, Standalone All-in-One Scan, for 3D Printing | 16GB RAM, 0.02mm, for Small-Large Objects, Outdoor Scan, Wi-Fi 6, Industrial 3D Modeling/Measurement, for Win/macOS
Mobile medium and large-object capture
Seller: Revopoint Official StoreEINSTAR 2
Reverse engineering, dark surfaces and larger parts

EINSTAR 2 Wireless 3D Scanner, 17 Parallel Lines Blue Laser and VCSEL Infared Light Support 3D Scanning Small to Large Objects, Up to 90 FPS High Speed Scanning, Support 3mm, 6mm, 12mm Markers.
Reverse engineering, dark surfaces and larger parts
Seller: SHINING 3D TECHNOLOGY INC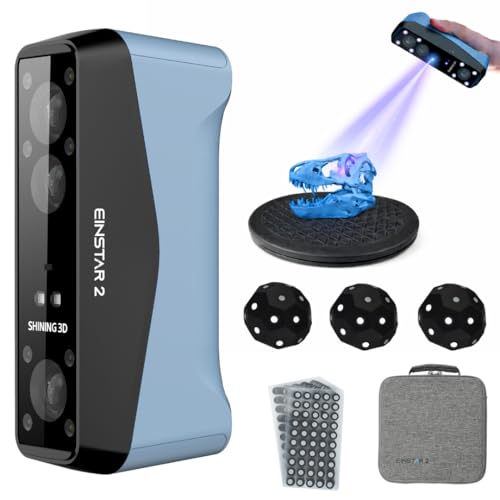
EINSTAR 2 Wireless Handheld 3D Scanner Hybrid | Full-Color Capture, Swappable Battery, EXStar Software
Reverse engineering, dark surfaces and larger parts
Seller: 3D UMAX - Authorized Shining3D Einscan DistributorBuying decision
Which scanner fits this job?
Start with the object, not the scanner. For large objects, decide whether the difficult part of the job is fine detail, surface reflectivity, object size or mobility. The top pick on this page is the strongest general fit, the second recommendation covers a different workflow strength, and the third offers a useful alternative when budget or setup changes. If your project combines multiple object classes, use the chooser below and compare the scanning mode rather than buying from price alone.
At a glance
Compare the recommended scanners
Detailed guide
How to get a better scan for this use case
Why large objects are difficult to scan well
Large-object scanning is primarily a tracking and workflow problem; portability and scan volume can matter more than headline fine-detail resolution. Typical targets include furniture, sculptures, vehicle panels, equipment housings, props, body-sized forms and large prototypes. Those objects do not present one uniform scanning problem: the scanner may move from objects from roughly torso size to furniture, panels and room-scale pieces while also dealing with broad matte areas, dark sections, glossy panels, repeated shapes and low-feature expanses. A useful buying decision therefore starts with the job you need to complete rather than the largest accuracy number printed on a specification sheet.
For this use case, preserve overall dimensions, curvature, edge transitions, large feature relationships and selected local details. If those features are lost, a visually smooth mesh can still be useless for large-scale replicas, fit references, design overlays, visualization, fabrication and segmented 3D prints. The best scanner is the one that can repeatedly hold tracking over the important geometry in spaces where the operator must walk around the object and may not be able to move the object itself, not simply the model with the most aggressive marketing claim.
The specifications that matter most
Accuracy, resolution and capture volume describe different things. For large objects, accuracy helps with the relationship between features, resolution affects the smallest surface changes that reach the mesh, and object range determines whether the scanner can cover objects from roughly torso size to furniture, panels and room-scale pieces without forcing an awkward working distance. Treat all three as a system rather than choosing from one headline number.
Light source is equally important because this page deals with broad matte areas, dark sections, glossy panels, repeated shapes and low-feature expanses. Blue-laser and hybrid systems can behave differently from infrared structured-light scanners, especially when the target is dark or reflective. Software, tracking recovery, export options and the computer or standalone hardware required to process the scan can affect the result as much as the optical specification.
How to choose among the recommended scanners
The three recommendations on this page cover different priorities. Choose the first pick when the central goal is overall dimensions, curvature, edge transitions, large feature relationships and selected local details. Move toward the more portable option when your real limitation is spaces where the operator must walk around the object and may not be able to move the object itself. Choose the value option when the object can be controlled, repositioned and prepared carefully enough that you can trade some workflow convenience for a lower purchase price.
Do not assume the same scanner must handle every part of a project. A broad scanner can capture the overall form of large objects, while a smaller-detail scanner or direct caliper measurement may still be better for one mating feature. Combining tools is often more reliable than forcing a single mesh to carry every design decision.
Preparing large objects before the first scan
Create clear walking space, stabilize movable elements, plan where you can maintain overlap, and decide which faces can be captured without moving the object. Good preparation shortens scanning time because the software spends less effort trying to recover from avoidable movement, glare or missing geometry.
Before capture, decide which regions will define the final model. Mark them mentally or in a photo, then plan orientations that expose those areas. Keep the setup consistent between passes. For large objects, a few minutes spent controlling the object and background usually saves far more time than trying to repair a badly aligned mesh later.
Markers, spray and difficult surfaces
Markers become more important as surfaces get larger and smoother because the scanner needs reliable references while you move over long distances. Markers are tracking aids, not a substitute for useful geometry. Keep them away from the precise edges or surface details you need to reconstruct.
Surface treatment should be targeted rather than blanket-applied; treat only the reflective or transparent areas that repeatedly break tracking. Surface treatment should solve a specific capture problem. If the scanner already holds tracking and returns clean geometry, adding coating or extra markers only increases preparation and cleanup.
A capture workflow that produces cleaner geometry
Break the job into overlapping zones, keep a consistent standoff distance and return to strong geometric landmarks before moving into another region. Watch the live tracking view rather than only the growing mesh; loss of correspondence is easier to correct immediately than after a long pass has been recorded.
Use enough overlap that each new region connects to geometry the software already understands. For large objects, deliberately capture edges, holes or landmarks from more than one angle. When the object has a hidden face, plan a separate orientation and align it through shared geometry instead of stretching one pass into an impossible viewing angle.
Cleaning the scan without destroying useful detail
After capture, remove floating fragments and obvious background geometry first. Then inspect the regions that matter for overall dimensions, curvature, edge transitions, large feature relationships and selected local details. Heavy smoothing can make a mesh look professional while rounding exactly the edges or relief needed for large-scale replicas, fit references, design overlays, visualization, fabrication and segmented 3D prints. Keep an untouched copy of the raw or minimally processed scan before aggressive cleanup.
If alignment is weak, return to the source passes before sculpting over the error. A clean-looking mesh built on bad registration is difficult to trust. For repeatable projects, save the scanner settings, working distance and preparation method that produced the best result so later scans of similar large objects do not start from zero.
From scan to CAD or a 3D-printable model
A scan mesh is not automatically an editable engineering model. For large-scale replicas, fit references, design overlays, visualization, fabrication and segmented 3D prints, decide whether you need a watertight mesh, a surface reference or rebuilt parametric CAD. Functional geometry such as holes, threads, planar faces and symmetry is often better recreated from the scan than accepted directly from millions of mesh triangles.
When the destination is 3D printing, repair non-manifold areas, check wall thickness and verify scale before slicing. When the destination is CAD, use the mesh as a reference and rebuild critical features around measured dimensions. This hybrid approach is especially important when overall dimensions, curvature, edge transitions, large feature relationships and selected local details determine fit.
Common mistakes and how to avoid them
Large scans fail through cumulative drift, lost tracking, inconsistent scale references, insufficient overlap, operator fatigue and trying to capture too much in one uninterrupted pass. The fix is usually to improve capture conditions or divide the job into smaller controlled passes, not to increase smoothing after the fact.
Another mistake is treating every numeric specification as directly comparable across brands and modes. A scanner may quote excellent local accuracy in one mode while your actual large objects workflow depends on tracking stability, scan volume, surface response and software. Use the recommendations as starting points, then validate the exact object class you expect to scan most often.
When a phone or photogrammetry may be enough
Phone scanning can work surprisingly well for coarse large shapes and spaces, but dedicated scanners provide better control when you need local detail or repeatable geometry.
Choose the simpler method when you mainly need visual documentation, approximate scale or a one-off reference. Move to a dedicated scanner when repeated projects, overall dimensions, curvature, edge transitions, large feature relationships and selected local details, difficult broad matte areas, dark sections, glossy panels, repeated shapes and low-feature expanses or the need for large-scale replicas, fit references, design overlays, visualization, fabrication and segmented 3D prints makes failed captures expensive. The practical threshold is not whether a phone can make a 3D model; it is whether that model is dependable enough for your next step.
Buyer questions
Frequently asked questions
What is the best 3D scanner for large objects?
For large objects, EINSTAR VEGA is the most convenient all-in-one choice when mobility matters. Revopoint MIRACO is another strong standalone option, while EINSTAR 2 is the better fit when you want a workshop scanner that can switch between larger-object capture and more detailed laser work.
How accurate should a scanner be for large objects?
It depends on the output. If the scan is mainly for visualization, overall shape and stable tracking can matter more than the smallest stated accuracy figure. If overall dimensions, curvature, edge transitions, large feature relationships and selected local details control fit or CAD reconstruction, choose a scanner and workflow that preserve those features and confirm important dimensions with direct measurement.
Do I need scanning spray for large objects?
Surface treatment should be targeted rather than blanket-applied; treat only the reflective or transparent areas that repeatedly break tracking. Start without spray when the surface already scans cleanly, then introduce treatment only where reflections or low signal repeatedly break the capture.
Do I need markers when scanning large objects?
Markers become more important as surfaces get larger and smoother because the scanner needs reliable references while you move over long distances. A scanner that tracks reliably from natural geometry does not need markers everywhere.
Can I turn the scan directly into a 3D print?
Often, but inspect the mesh first. Remove unwanted geometry, close holes, confirm scale and check wall thickness. For functional large objects, rebuild or verify critical interfaces rather than assuming the raw mesh is print-ready.
Can I use the scan for CAD and reverse engineering?
Yes, but the mesh normally serves as a geometric reference rather than a finished parametric model. Rebuild planes, cylinders, holes, symmetry and other design features around the scan, especially where overall dimensions, curvature, edge transitions, large feature relationships and selected local details matter.
Is a phone good enough instead of a dedicated 3D scanner?
What should I check before buying a scanner?
Check the object-size range, surface behavior, required computer or standalone workflow, export formats, included accessories and the exact Amazon listing. Make sure you are buying the scanner itself rather than a case, turntable, marker kit, spray or other accessory.
Manufacturer references
Specifications can vary by scanning mode, software version and bundle. Confirm the exact model and included items before buying.